How to create a rectangular floor plan
Drawing your room is the first step in any design — and for most rooms, it takes about a minute. Here's how to set up a basic rectangular floor plan with accurate, to-scale measurements.
Every room starts the same way: four walls and two numbers. In Room Sketch 3D you enter those two numbers and get a precise, to-scale floor plan you can furnish, view in 3D, and run through Smart Flow Check.
If your room isn't a clean rectangle — alcoves, an L-shape, a bay window — use the Custom shape tool instead (see Drawing a custom-shaped room).
What you'll need
- •A Room Sketch 3D account
- •The width and length of your room in feet or meters (measure wall to wall)
Step by step
- 1
Start a new design
From your dashboard, click New Design. The “Design My Room” window opens with several ways to begin a room.
- 2
Choose “Rectangle”
You'll see options for Rectangle, Custom shapes, AR scan, Photo, Import, and Templates. For a standard four-wall room, click Rectangle (“Enter width & length”).
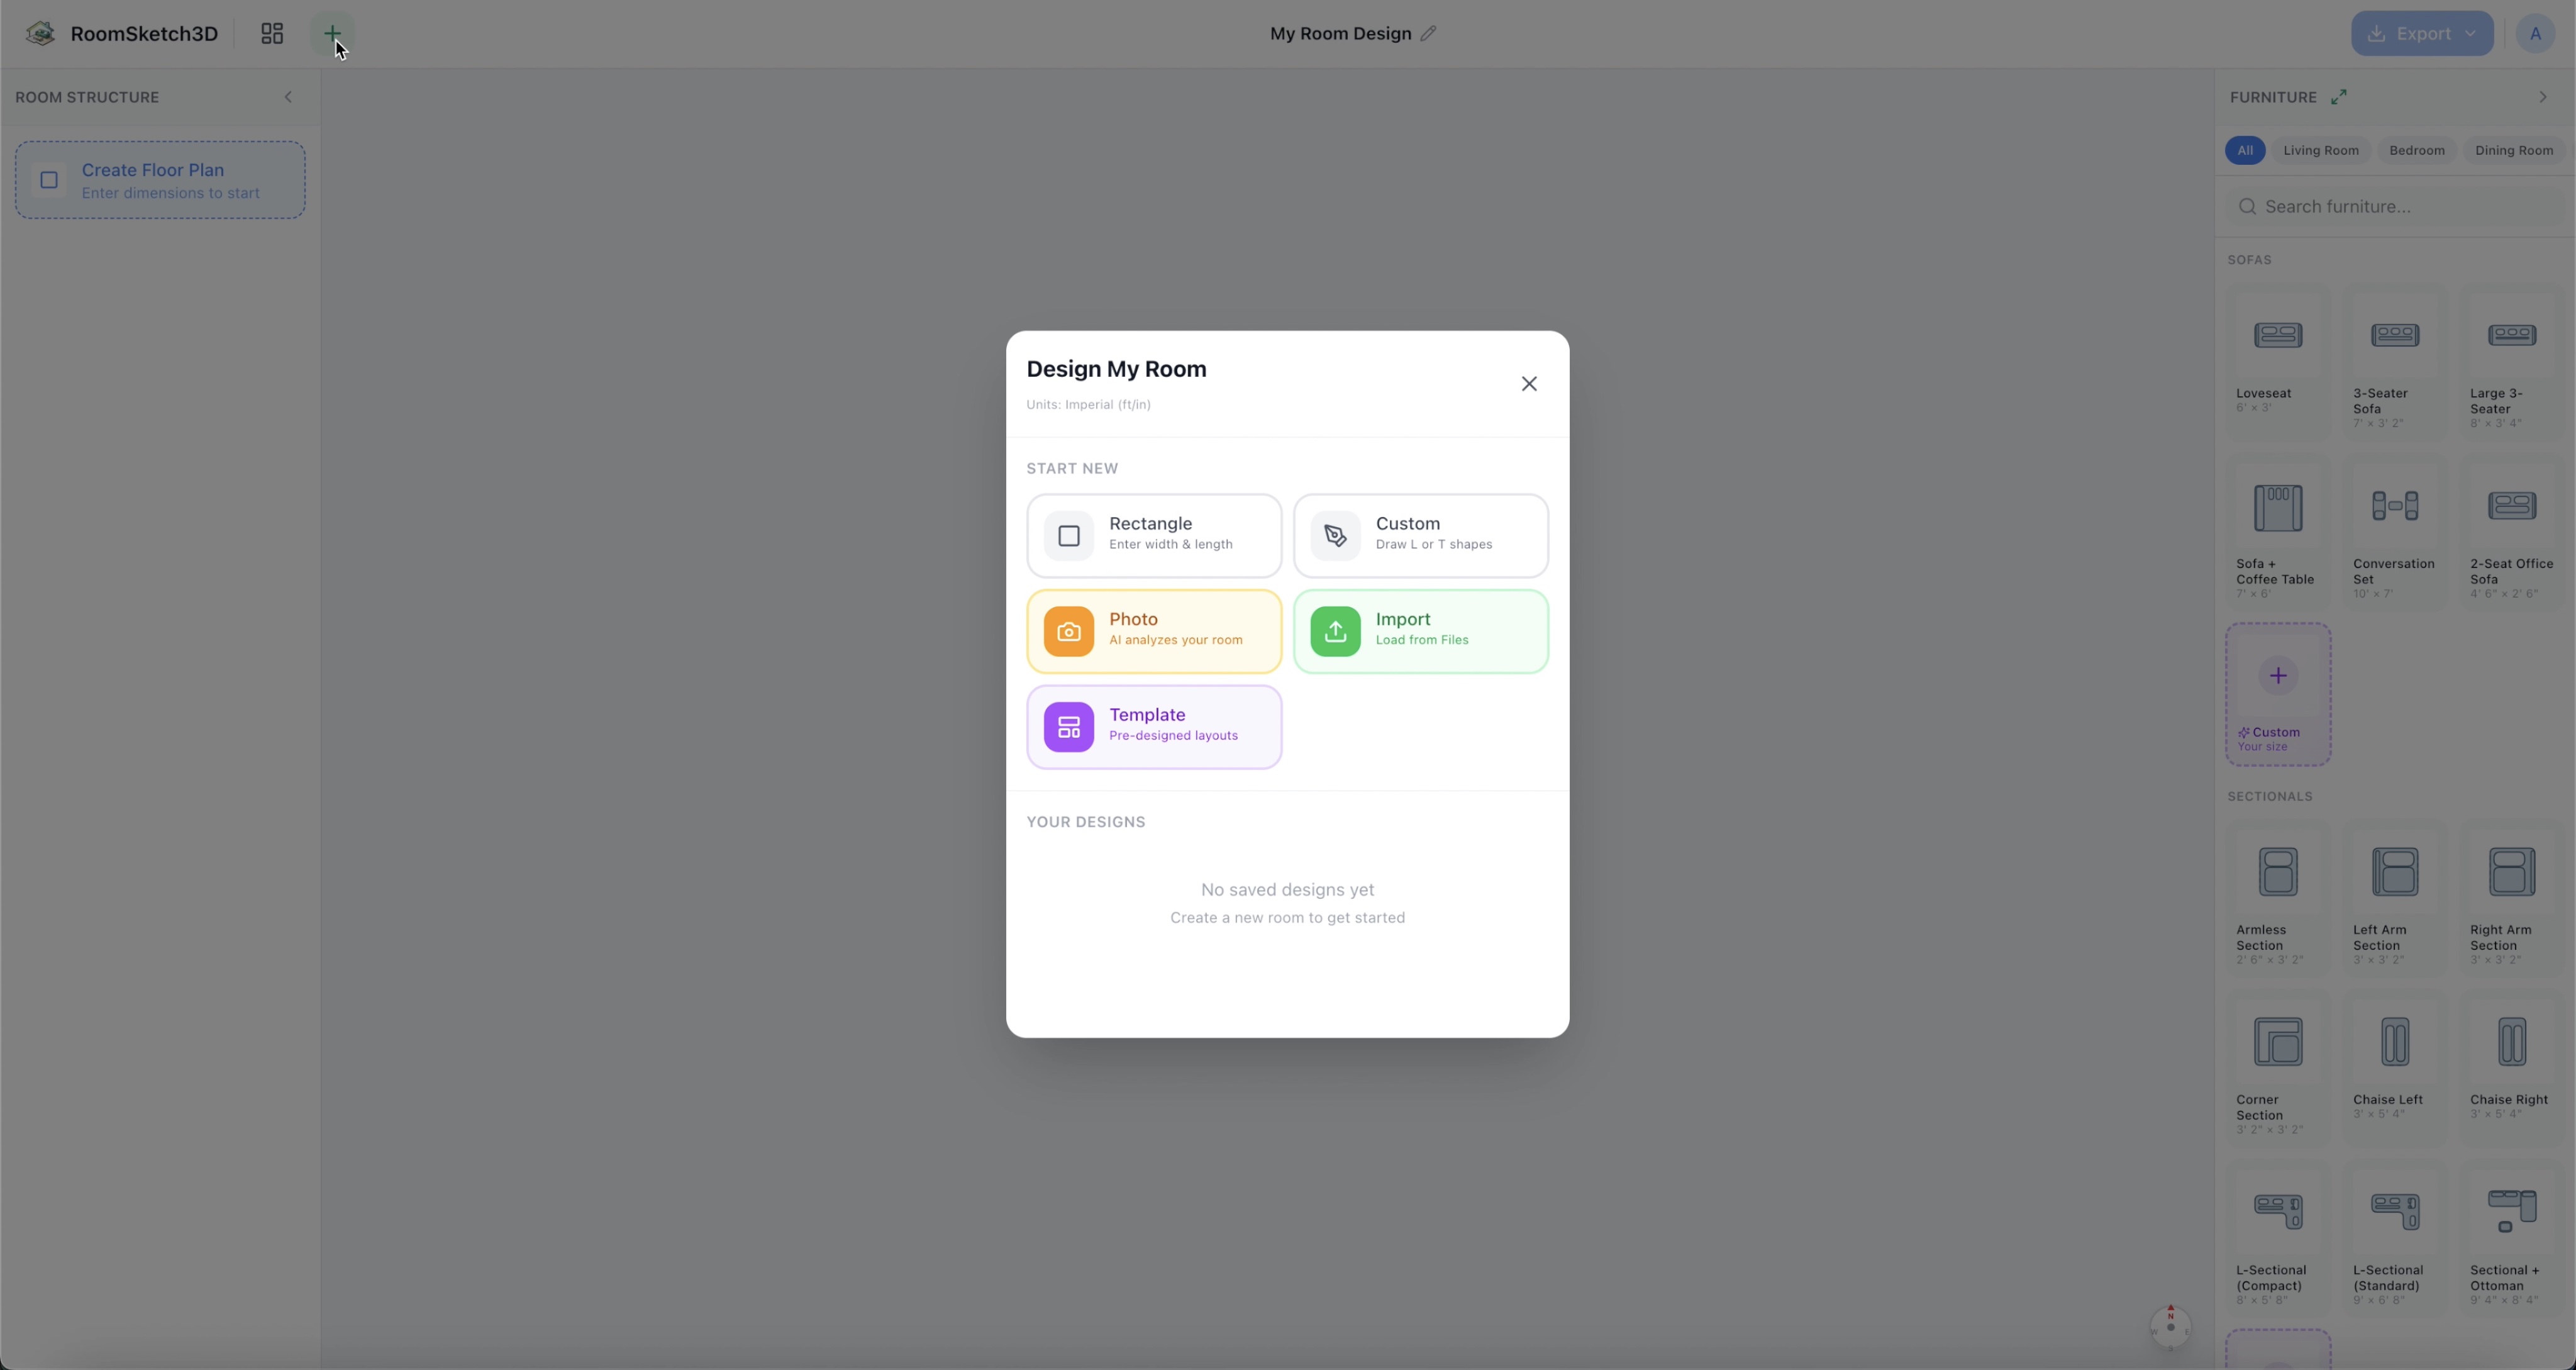
Click Rectangle to open the rectangle setup dialog. - 3
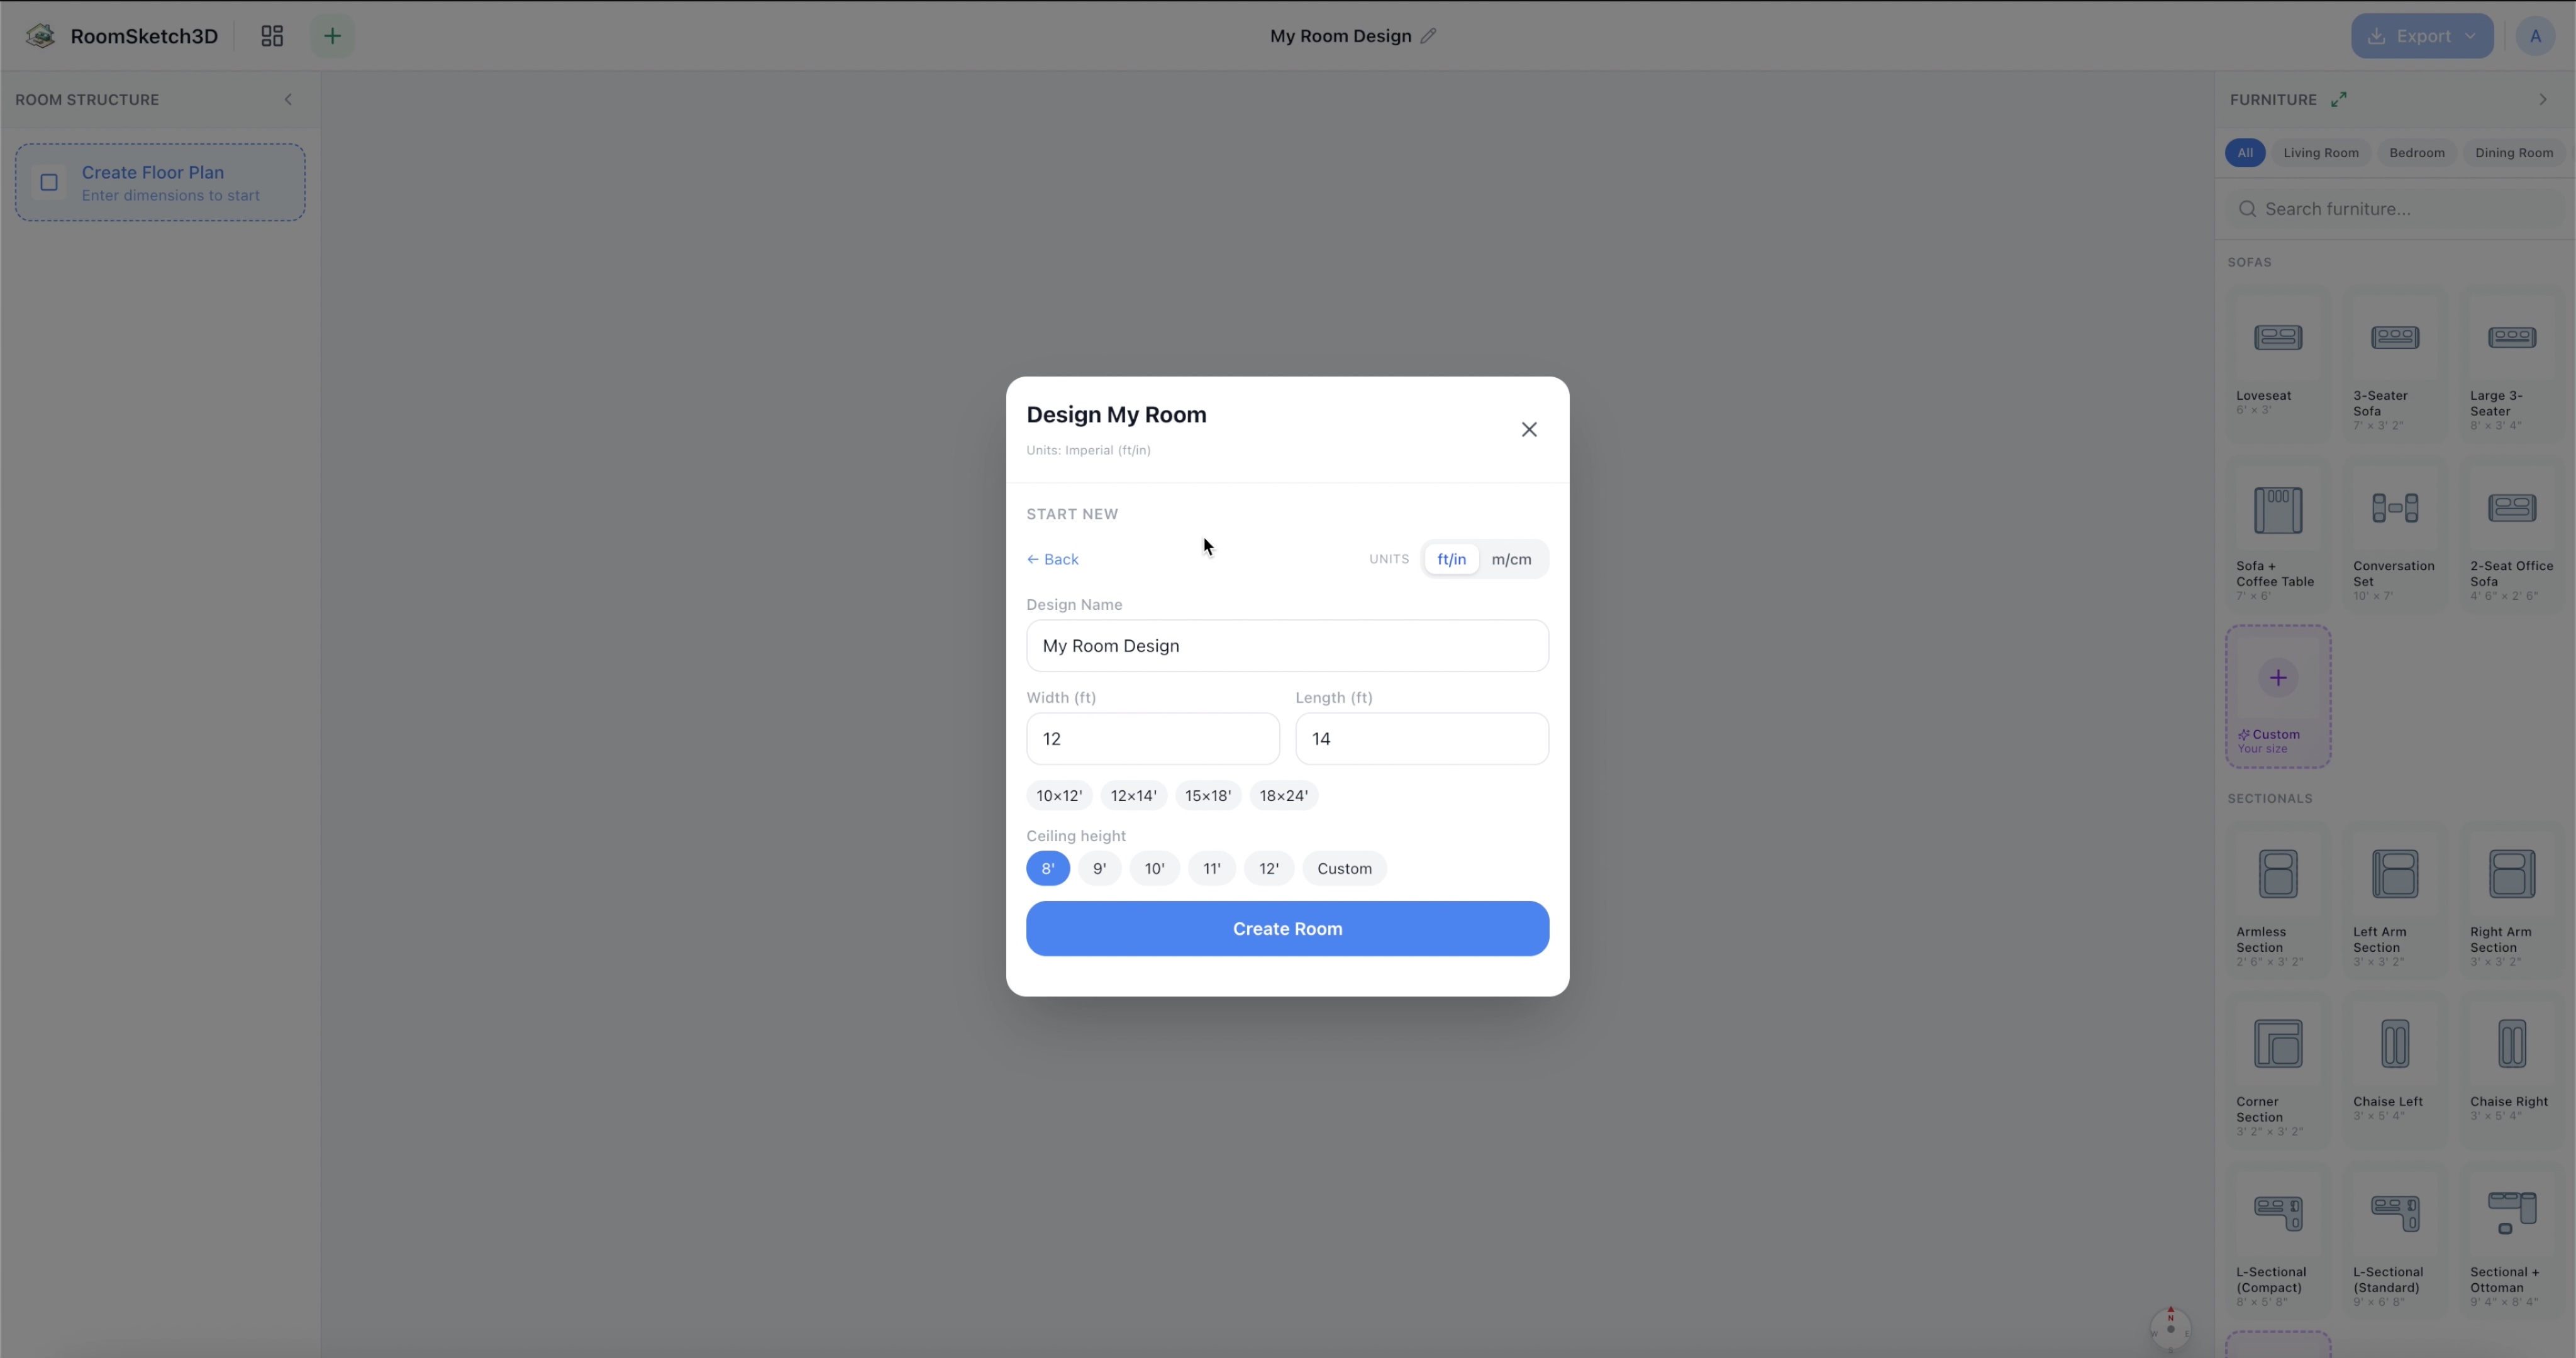
Pick your units
At the top of the Rectangle form there's a ft/in ↔ m/cm toggle. Choose feet/inches or meters/centimeters — whichever you measure in. The change applies everywhere in the app (room size, furniture, the inspector) and is remembered for next time. Imperial is the default. The same toggle also appears when you draw a custom-shaped room, and you can change it later in Profile → Settings.
- 4
Name your design
Type something you'll recognize later, like “Living Room” or “Master Bedroom.”
- 5
Enter your dimensions
Type your room's Width and Length. Not sure of the exact size yet? Tap one of the quick-preset chips (like 12×14′) and fine-tune it afterward — you can change the dimensions anytime.
Enter your room's width and length. - 6
Set the ceiling height
Eight feet (about 2.4 m) is standard for most homes; pick a preset or enter a custom height. This matters for the 3D view later.
- 7
Click “Create Room”
Your floor plan appears on the canvas, drawn precisely to scale. Drag to pan around it, and scroll (or pinch) to zoom in and out. That's your foundation — next, add furniture.
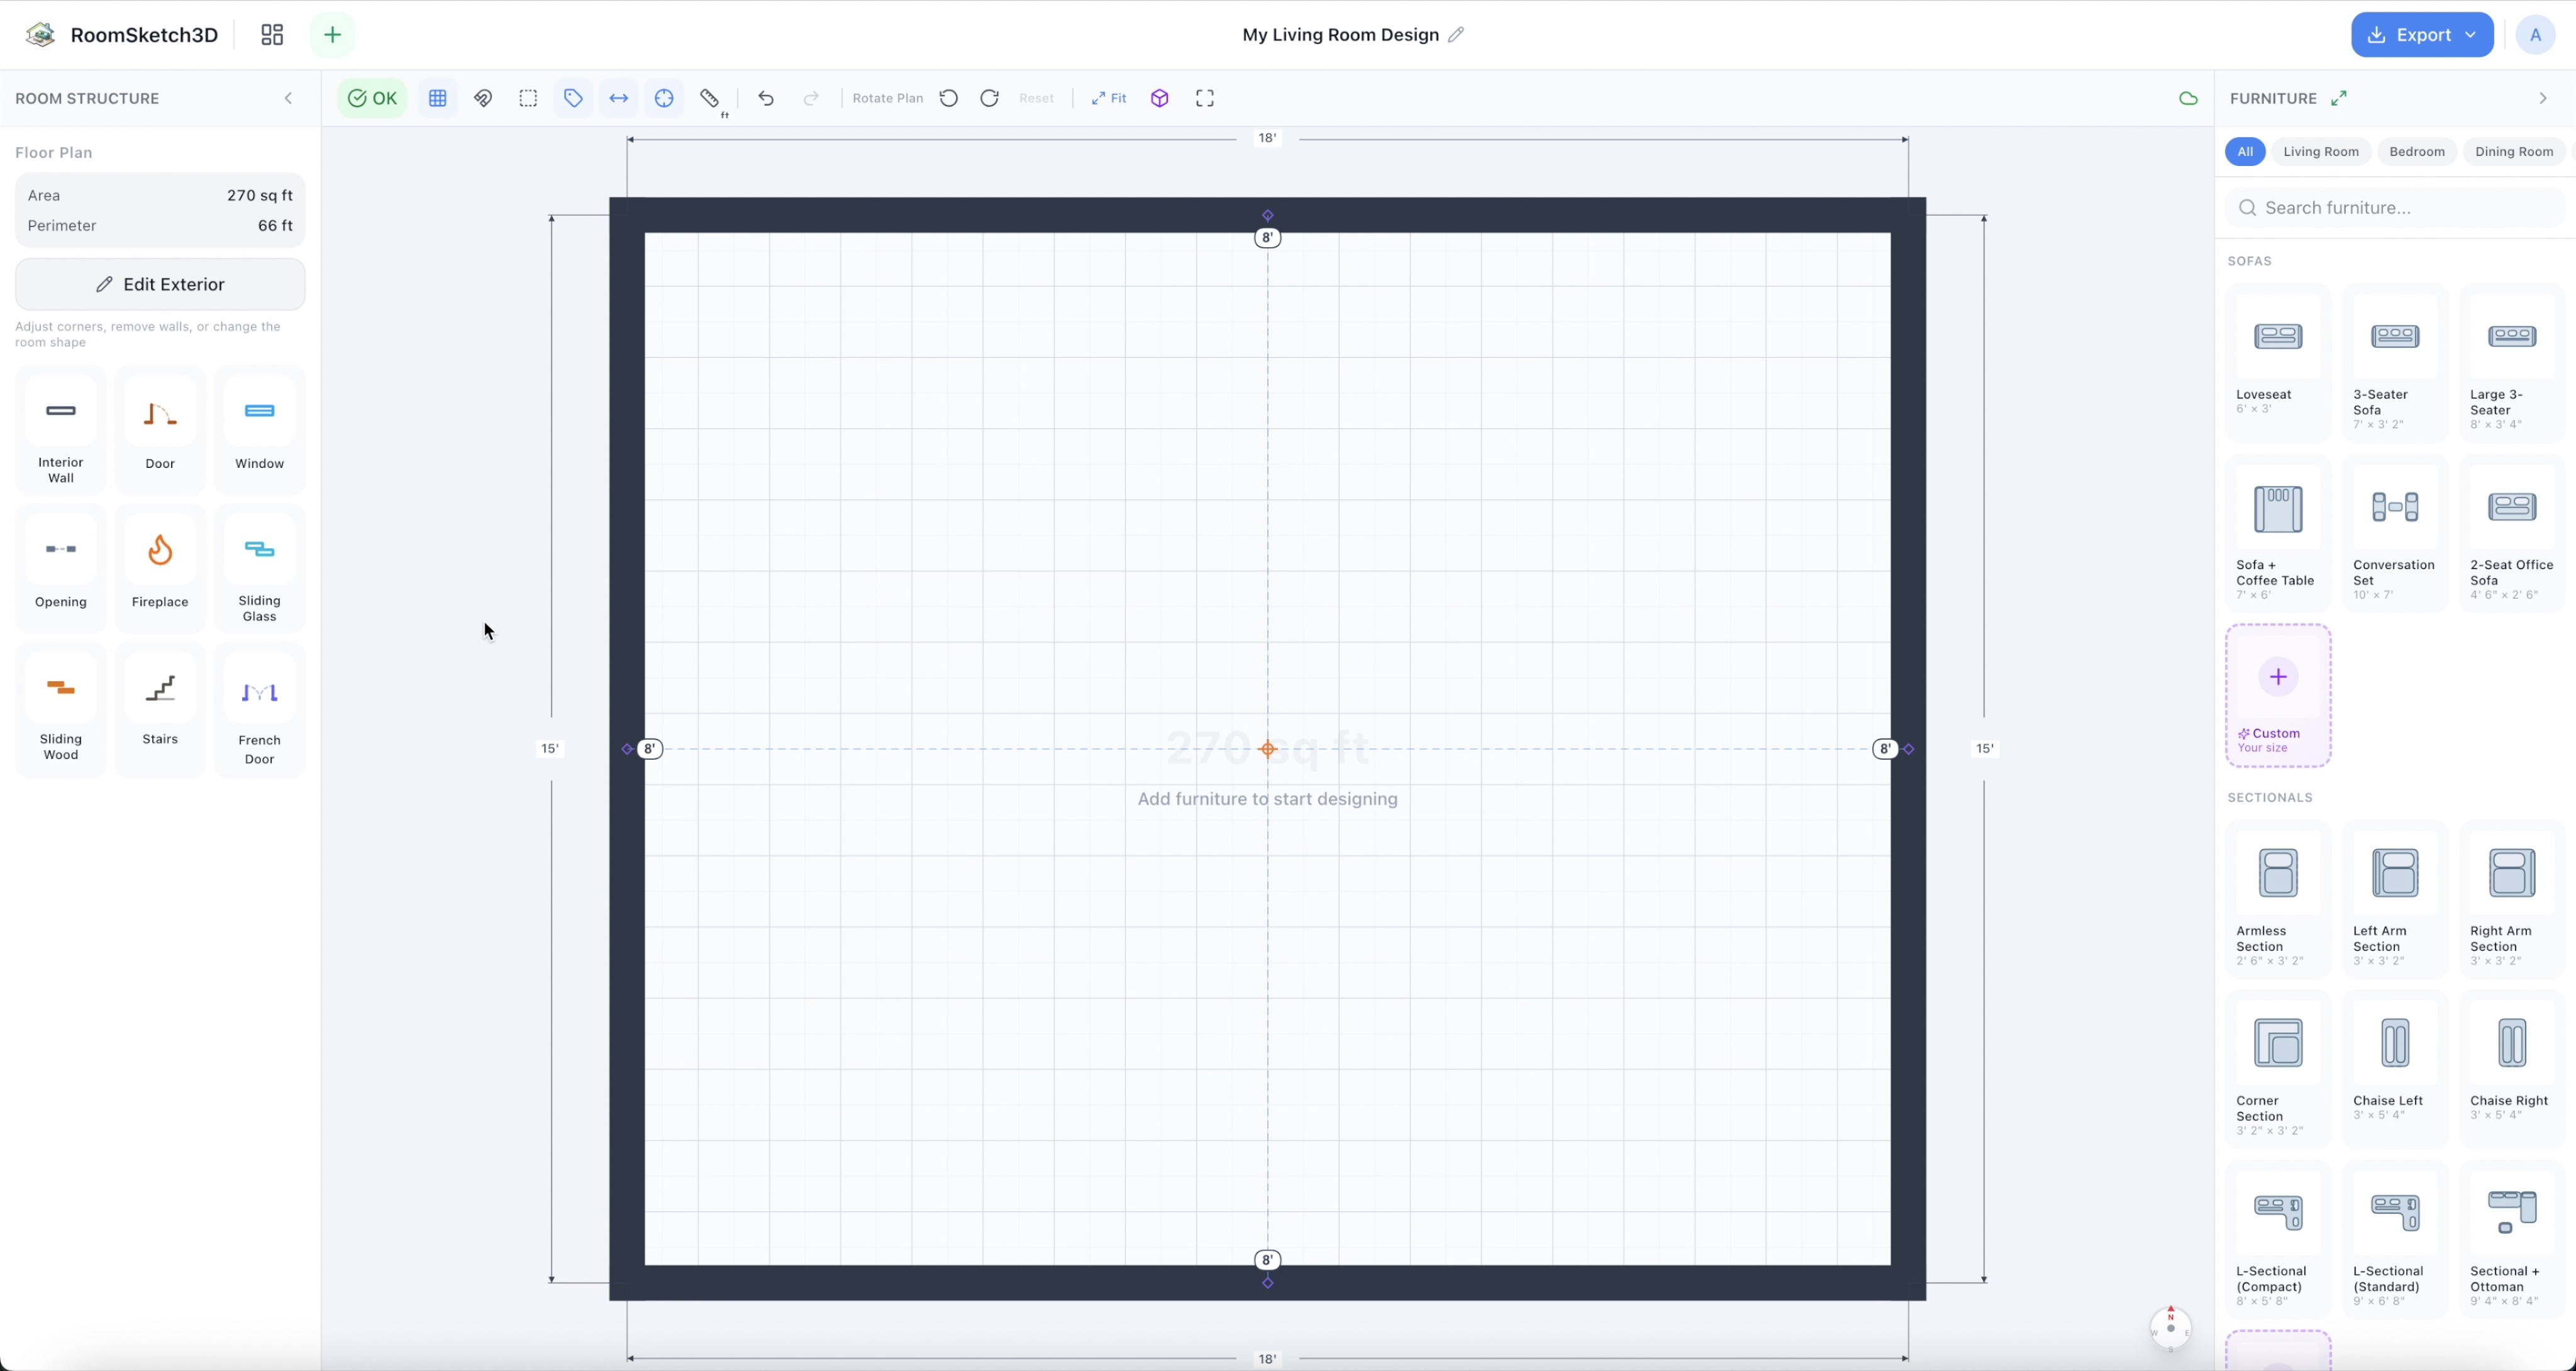
Your floor plan appears on the canvas, drawn precisely to scale.
Tips
Measure wall to wall
Measure the actual wall surfaces, not baseboard to baseboard — small differences add up across a room and throw off whether furniture fits.
Set your units once
If you think in meters, flip the ft/in · m/cm toggle the first time you create a room. Every dimension in the app follows that choice from then on.
Nothing here is permanent
You can change the width, length, and ceiling height later by selecting a wall and editing it, or from the room properties — start rough and refine.
Common mistakes
Forcing a non-rectangular room into a rectangle
If your room has an alcove, a chimney breast, or an L-shape, don't approximate it with a rectangle — use the Custom shape tool so Smart Flow Check and the 3D view are accurate.
Guessing the dimensions and never correcting them
Starting from a preset is fine, but if you don't replace it with your real measurements, the “will it fit?” check is meaningless. Update the numbers as soon as you have them.
Frequently asked questions
Can I change the room size after I create it?
Yes — select a wall and edit its length, or open the room properties; the layout updates live without affecting the furniture you've placed.
Can I use centimeters / metric?
Yes. Flip the ft/in ↔ m/cm toggle at the top of the room setup dialog (it's also in Profile → Settings). Every dimension in the app updates, and switching back later doesn't change your designs.
What if my room is L-shaped or irregular?
Use the Custom shape tool from the “Design My Room” window to draw any polygon — see the guide on drawing a custom-shaped room.
Do I need exact measurements to start?
No — start from a quick preset and adjust later. But accurate, to-scale measurements are what make the 3D view and Smart Flow Check trustworthy.
How much does Room Sketch 3D cost?
It's a one-time purchase of $9.99 with full access on web, iOS, and Android — no subscription and no recurring fees.
Start designing your room
Draw it, furnish it, walk through it in 3D — on web, iOS, and Android.
Open Room Sketch 3DOne-time purchase · No subscription · Web, iOS & Android